
DIY Mirror Mosaic Wall Art: A Step-by-Step Guide to Creating a Stunning Reflective Accent
DIY mirror mosaic wall art is a creative way to introduce light, texture, and personality into your home. The reflective quality of mirror tiles helps brighten rooms while adding artistic depth. This project works well for accent walls, entryways, and decorative panels. It allows you to customize size, pattern, and style to suit your interior. With the right materials and planning, you can achieve a polished, professional look at home.
Why Mirror Mosaic Wall Art Is a Smart DIY Project
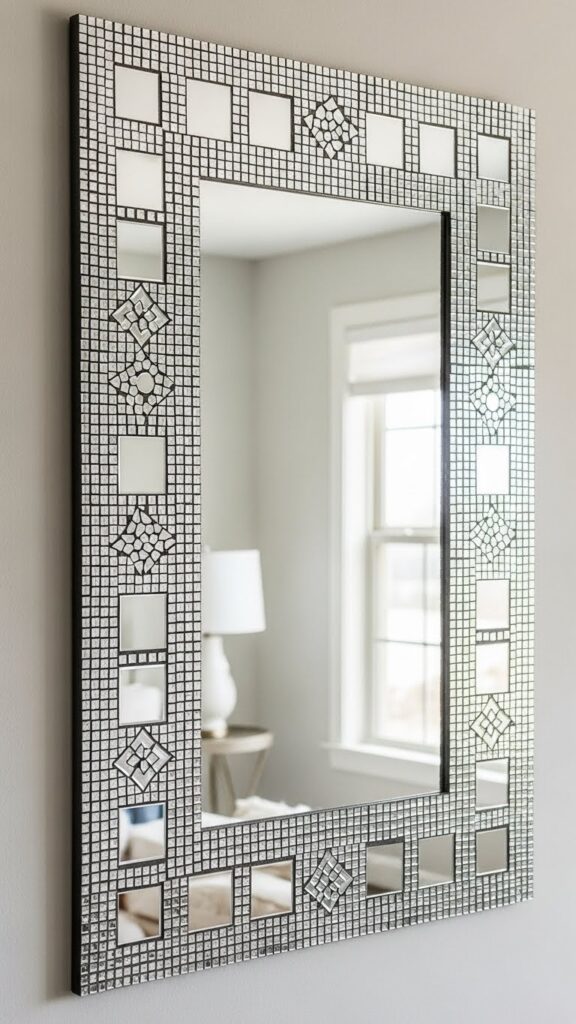
Mirror mosaic wall art offers both visual impact and functional benefits. It reflects natural and artificial light, making spaces feel larger and more open. Unlike standard mirrors, mosaic designs add texture and artistic interest. This type of wall art works across many interior styles, from modern to cottage-inspired. It also allows for creative expression without requiring advanced skills.
Materials Needed for DIY Mirror Mosaic Wall Art
Choosing quality materials ensures durability and a refined finish. Investing in the right supplies reduces frustration during installation and improves the final result.
Essential materials include:
- Mirror tiles or safely prepared broken mirror pieces
- Strong mirror-safe adhesive or tile mortar
- A sturdy base such as MDF board, plywood, or thick canvas
- Grout suitable for glass or mirror surfaces
- Safety gloves and protective eyewear
Using proper tools helps achieve a clean, long-lasting mosaic design.
Choosing the Best Base for Your Project
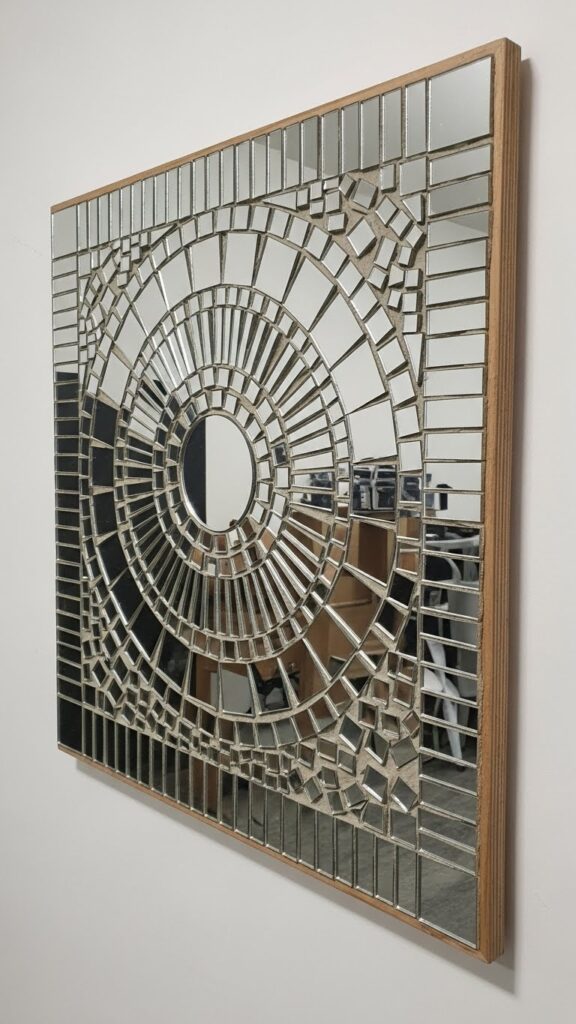
The base provides structure and stability for your mirror mosaic wall art. It must be flat, strong, and resistant to moisture if placed in humid areas. The size of the base should align with where the artwork will be displayed. Pre-sealing wooden bases helps prevent warping. A well-prepared base makes the installation process smoother and more professional.
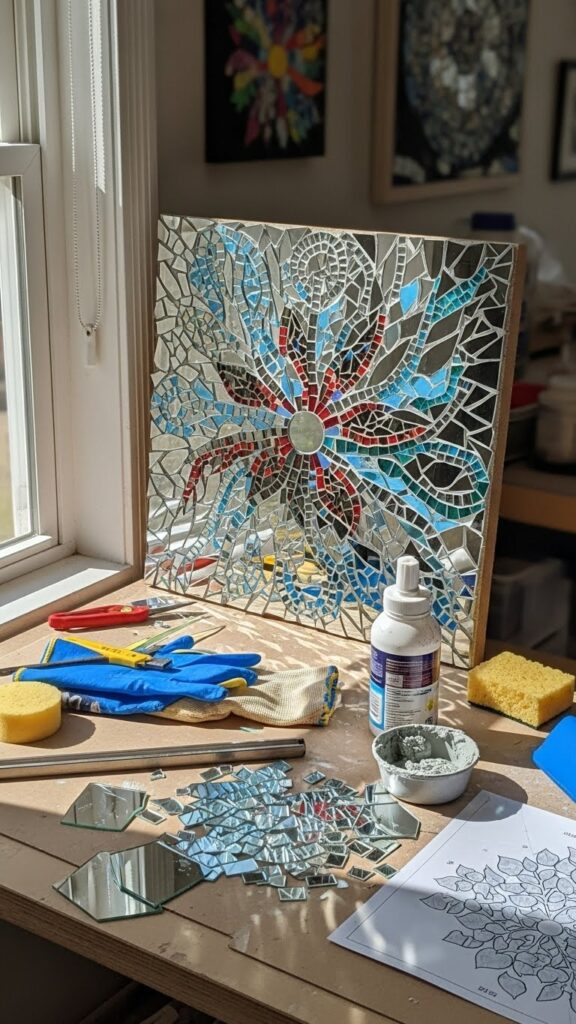
Planning Your Mosaic Design Layout

Design planning is essential before attaching any mirror pieces. Laying out tiles in advance helps you visualize spacing and balance. This step allows adjustments without damage. Symmetrical layouts feel polished, while irregular designs feel artistic and handmade. Planning also ensures even grout lines and a cohesive look.
Adhesives and Grout Options Explained
Not all adhesives and grouts are suitable for mirror mosaics. Choosing mirror-safe products prevents damage and discoloration. The right combination ensures durability and a clean finish.
| Component | Recommended Option | Why It Works |
|---|---|---|
| Adhesive | Mirror mastic or tile adhesive | Prevents corrosion and slippage |
| Grout | Unsanded or fine grout | Protects mirror edges |
| Sealant | Clear grout sealer | Improves longevity and cleanliness |
Selecting the correct products protects both appearance and safety.
Installing the Mirror Mosaic Pieces
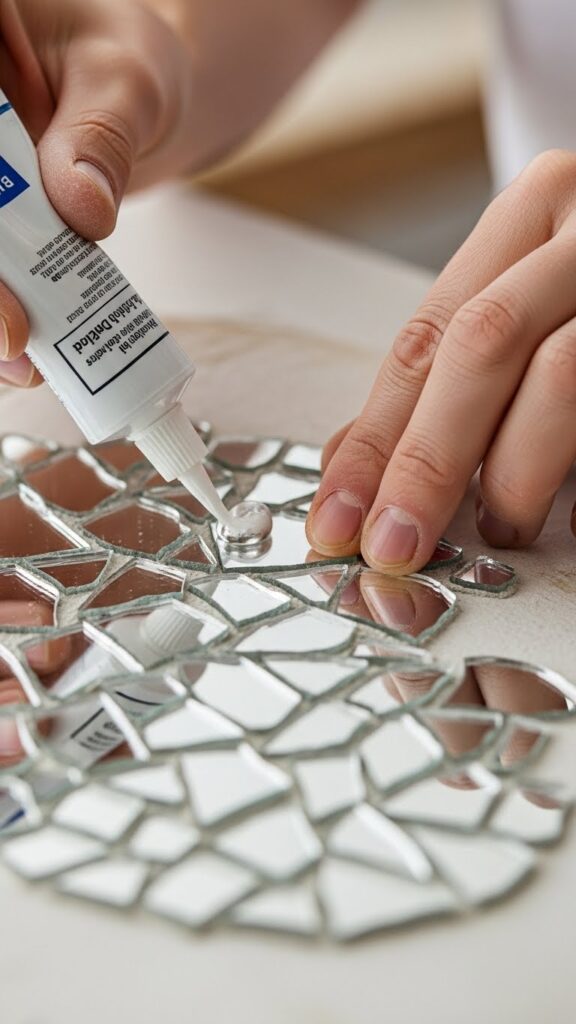
Installation should be done slowly and carefully for best results. Apply adhesive evenly and press mirror pieces gently into place. Leave consistent spacing for grout lines. Allow adequate drying time before grouting. Patience during this step leads to a more polished final look.
Grouting and Finishing Touches
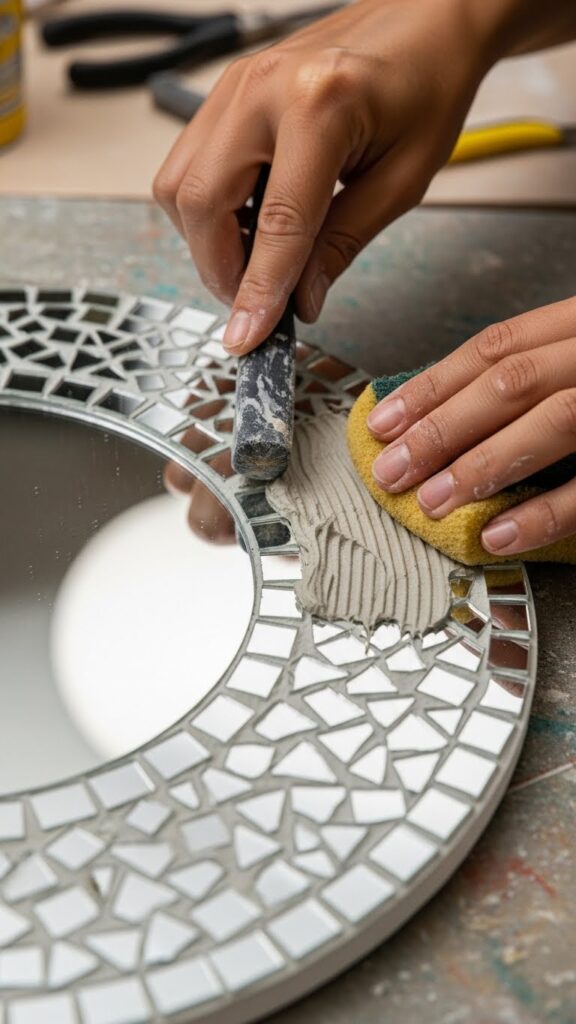
Grouting brings the entire mosaic together visually. Apply grout carefully, pressing it into the gaps without scratching the mirror surface. Wipe excess grout with a damp sponge once it begins to set. After drying, seal the grout to protect it from moisture and stains. This final step enhances durability and appearance.
Safety Tips for DIY Mirror Mosaic Projects
Working with mirrors requires extra care to prevent injury. Safety should always be a priority during this DIY project.
Important safety practices include:
- Wearing gloves when handling mirror pieces
- Using eye protection during cutting or breaking
- Smoothing sharp edges before installation
- Working on a stable, flat surface
Following these precautions helps ensure a safe and enjoyable experience.
Where DIY Mirror Mosaic Wall Art Works Best
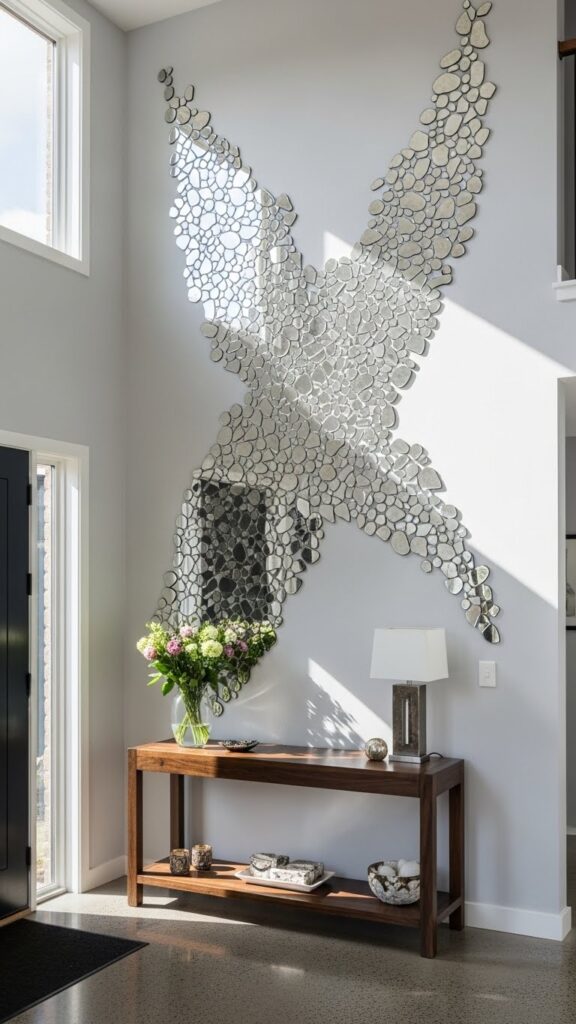
Mirror mosaic wall art is versatile and works in many areas of the home. It enhances light in darker spaces and adds interest to plain walls. Popular placements include entryways, living rooms, and dining areas. Smaller pieces work well in bathrooms when properly sealed. Strategic placement maximizes both beauty and function.
Maintenance and Long-Term Care
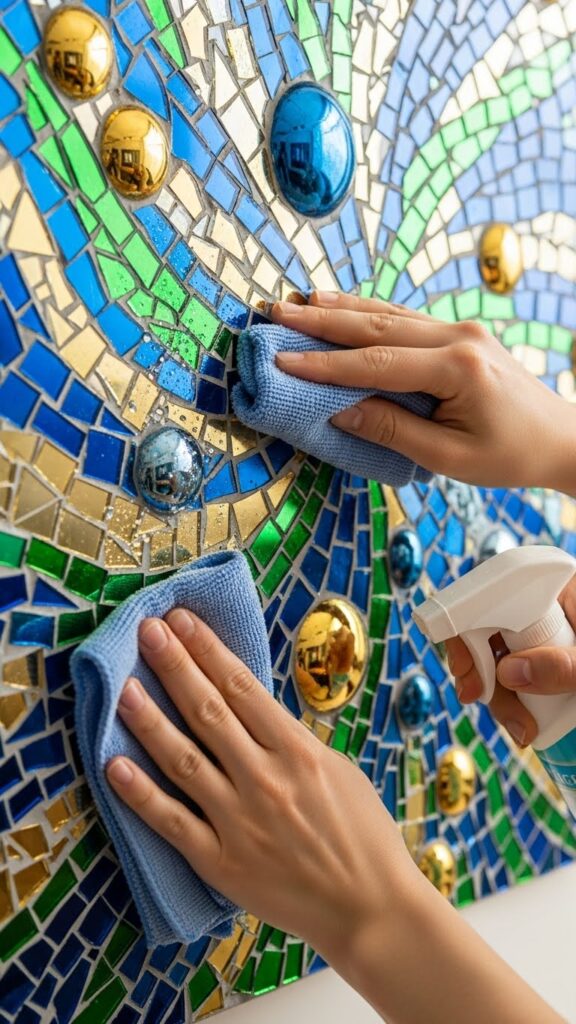
Maintaining mirror mosaic wall art is simple with regular care. Clean gently using a soft cloth and mild cleaner. Avoid abrasive products that can scratch the surface. Sealed grout helps prevent discoloration over time. With proper care, your DIY artwork will remain beautiful for years.
Conclusion
DIY mirror mosaic wall art is a rewarding project that combines creativity, function, and personal style. With careful planning, quality materials, and attention to detail, you can create a professional-looking decorative feature. This project enhances light, adds texture, and elevates your interior design. It is an accessible way to achieve a custom, high-end look at home. Mirror mosaics remain a timeless and impactful design choice.


